How I got a verified Facebook page
I've had a verified Facebook page for about four months. I've been asked by other bloggers, freelancers and influencers:
“How did you get that little blue check mark?”
a time or two so I decided to do a post to explain the steps I took to get a verified Facebook page.
If you're not sure what I'm talking about, I mean the verified badge on Facebook, which tells people that the page belongs to an authentic public figure, media company or brand. It doesn’t mean I get more engagement or page likes or referral traffic back to my blog, it just means that according to Facebook, I’m an authentic public figure and that they’ve verified I am who I claim to be.
Anyone could make a page and called “Ripped Jeans and Bifocals by Jill Robbins.” As Facebook users, we have a great deal of freedom in how and what we name our pages. Verification is just the extra step to…well, verify that the page is authentic. It doesn’t mean pages without the blue check mark aren’t authentic, it just means Facebook hasn’t verified them as such.
Facebook verification has nothing to do with the number of followers a page has, so if you have a smaller page, don’t automatically rule yourself out. Unfortunately, Facebook doesn’t publish clear rules on what pages will or won’t get verified or make any sort of guarantees. You have to be the owner of the page to apply for verification – not an admin. Your page should fall into one of these categories: public figure, Media Company or brand. You may also see the gray check mark on other pages which verifies the authenticity of a business or organization.
I don’t claim to have the secret sauce for those of you who covet the blue check mark (which is pretty cool to have) but I am happy to share the steps I went through to verify my Facebook page.
Some background on me: I had my Facebook page for over two years before I applied to have it verified and my page was very active for the entire time it’s been in existence. Prior to applying for a verified badge, my name was “out there” as a blogger, freelance writer and speaker. My writing had appeared in several online magazines, a handful of print publications and in three anthologies. I’d received some press due to my participation in the Listen to Your Mother show. I wasn’t a complete unknown in the world of online publishing.
So, here’s what I did.
1. I changed the name of my page from “Ripped Jeans and Bifocals” to “Jill Robbins – Ripped Jeans & Bifocals.”
Although I’ve seen no clear rules or guidance that suggest Facebook pages that have the page owner’s name in the title of the page have a better shot at verification, I did hear some social media buzz that suggested just that. All in all, I’ve found having my name clearly associated with my blog and social media accounts to be overall beneficial for my branding. When you land on my Facebook page, you get an immediate and clear idea of what the page is about and whose page it is.
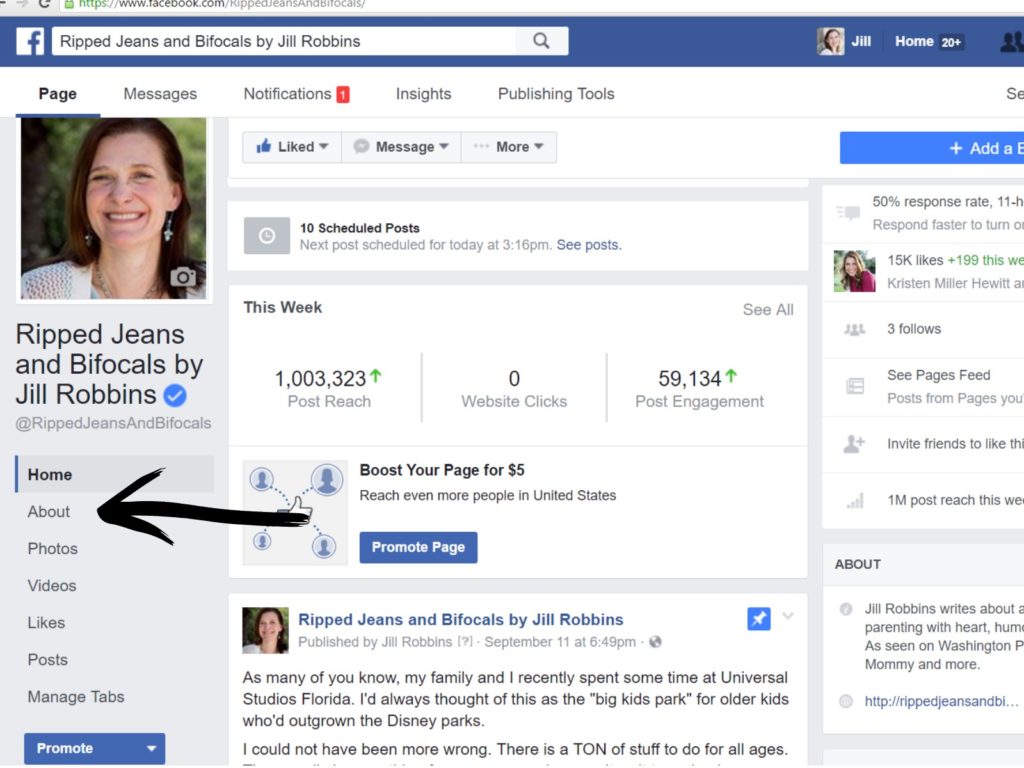
2. I filled in my “About” section as thoroughly as I could.
Every Facebook page should fill in their about section as thoroughly as possible. Facebook gives the user an unlimited amount of space to tell about yourself, your page and what you offer, so why not use it? This is easily editable and you can add to it as events occur…or change the tone of the message that you’re putting out.
The about section is divided into short description, long description and personal interests. You can add awards and honors, affiliations and your contact information. Spend some time brainstorming what you’ve done and think about what you want to put in this section. You can link to specific work, video clips or posts that you want to showcase. If you’re a brand ambassador or have appeared in the media, shout it out here!
3. I applied…
…but, before I did, I made sure my page was ready for company. My header provides a clear snapshot of what my page is about. My profile picture is a clear, professional looking photograph of me that looks like me and I made sure my current posts, photographs and videos represented my brand well. I also double checked my page description and my recent text posts for typos.
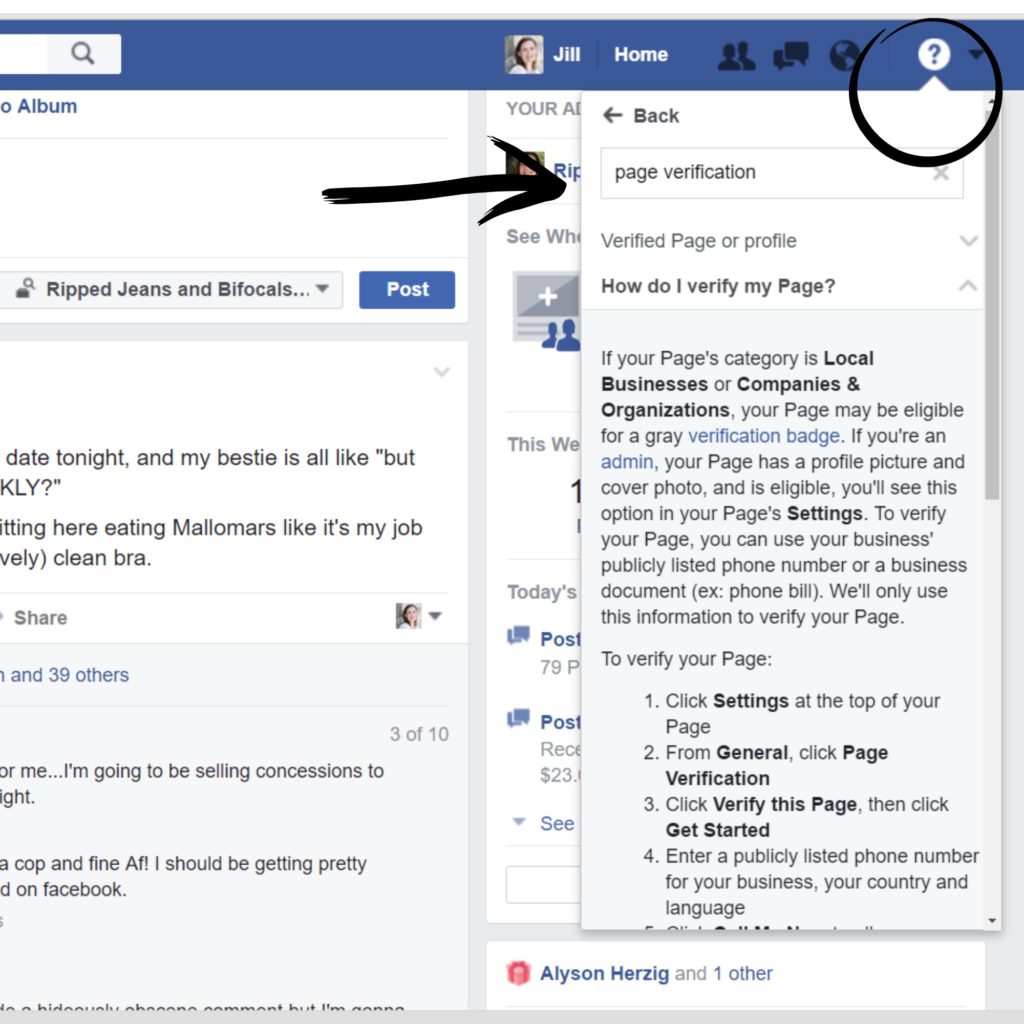
The application process is within Facebook and is actually pretty simple. Go to the Quick Help at the top left of your screen and type in “page verification” or something similar in the search box.
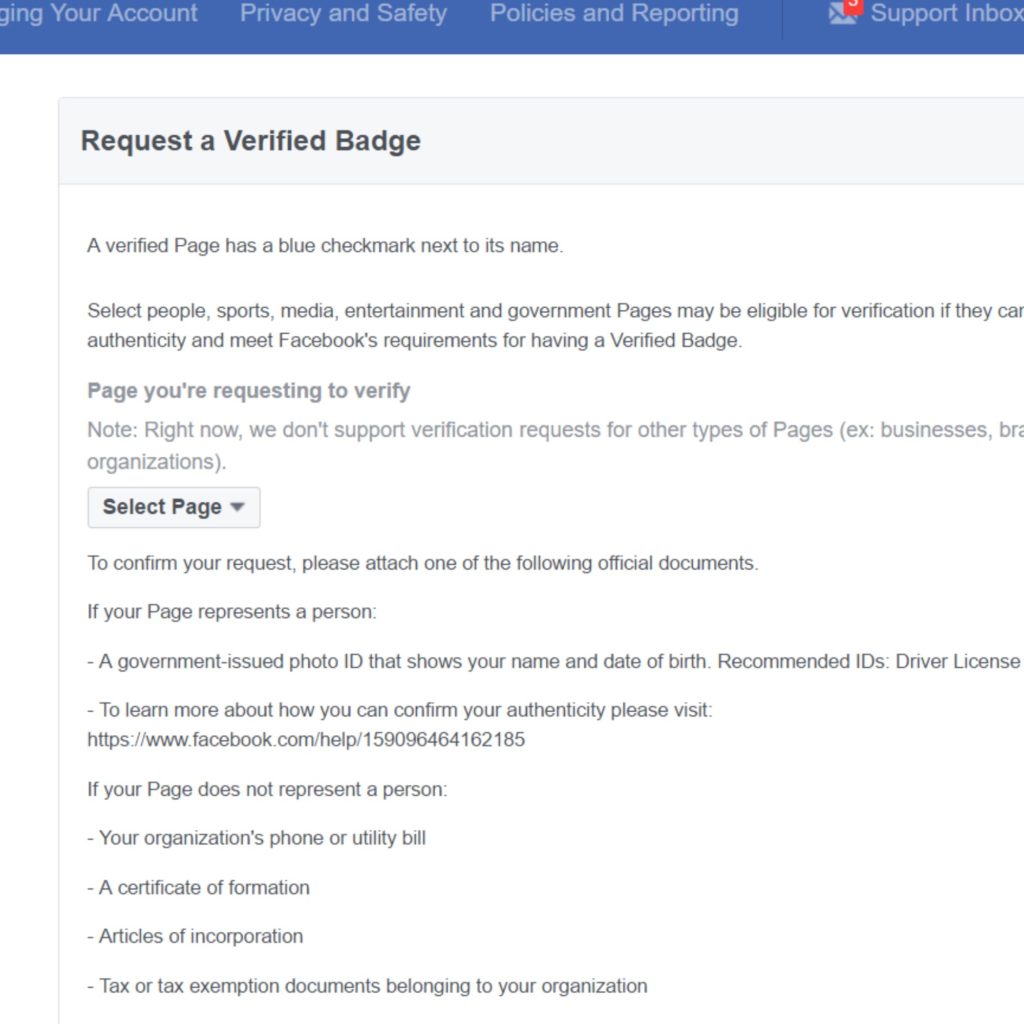
You will see information about how to apply for verification for businesses and organizations. Keep scrolling until you see the paragraph that begins with “Note: If your page represents a celebrity, public figure, sports team.” You will see hyperlinked text fill out this form. Click that link. This will take you to the form where you apply for verification. It looks like this:
Hit the “select page” button to select which page you would like to verify (if you own more than one page.)
Read through the instructions. They're pretty simple. They ask for proof of who you are, such as a government-issued ID or your organization's phone or utility bill. I attached a copy of my passport to show that it’s really me and I also attached a one page document that had links to some of the places I’ve appeared online. I have had a lot of writing published but I only picked half dozen things that I was most proud of that I felt represented me well. I also provided the ISBNs to the books I’ve appeared in and a link to a YouTube video of me speaking. All of this went toward validating that I’m a verifiable public figure.
My one-pager is very similar to the information in my “about” section on Facebook. I wanted to leave no question about my authenticity unanswered, so I took a little time on the front end and to make it easy for Facebook to see the things I’ve done that add up to me being me.
There is also a place to add a link to your official website. I attached my two documents (copy of passport and one pager), entered my website info and clicked “send” – the button is at the bottom right. Can't miss it.
And then they turned me down! Womp womp, sad trombone.
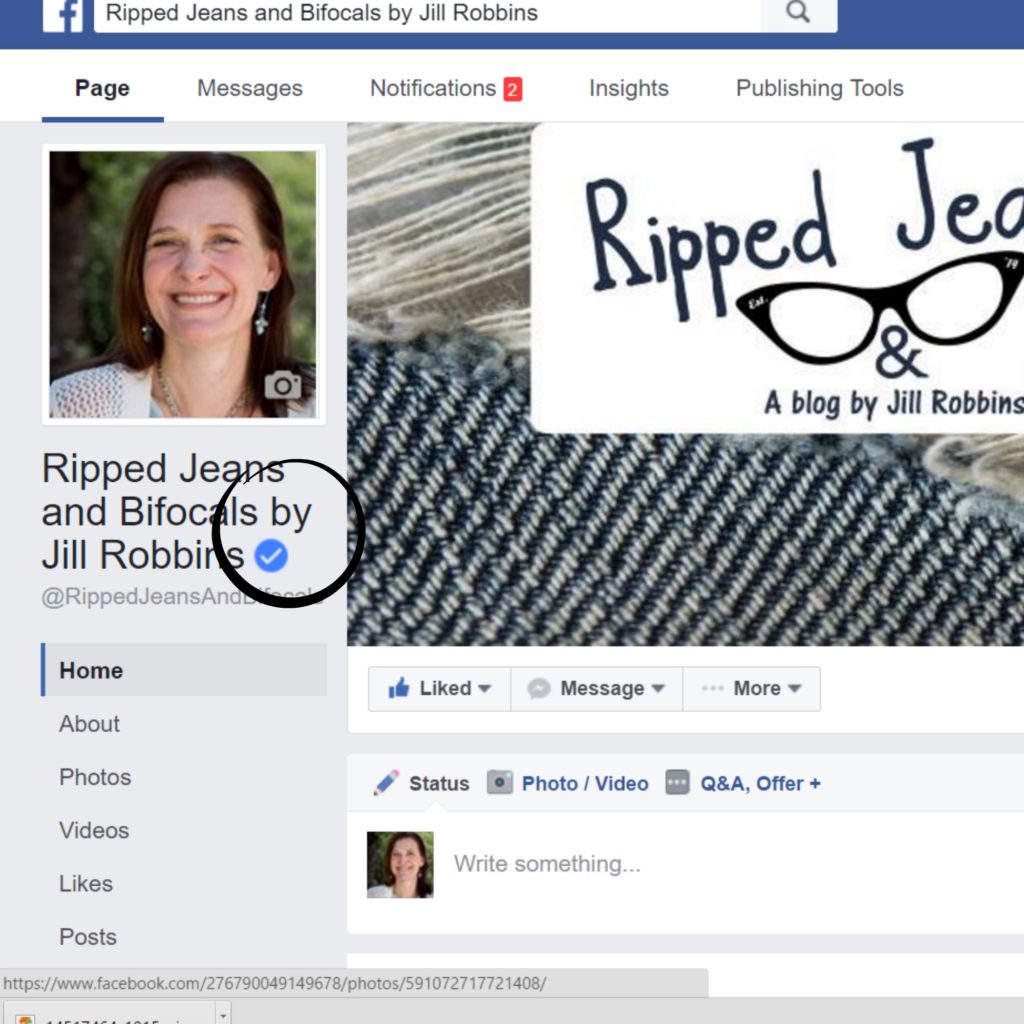
The culprit was the ampersand in Ripped Jeans & Bifocals. A symbol in my page name made it ineligible for verification but it was an easy fix. I changed my page name to Ripped Jeans and Bifocals by Jill Robbins, reapplied and was accepted about a day later. The blue badge appeared next to my page name and I didn’t have to do anything special.
A verified page makes gives me more visibility in searches – the blue check mark makes my page stand out when people are searching for me on Facebook – although I don't know of any other page that is similarly named to mine. The check mark also appears next to my name when I comment on one of my posts, so the things I say on my page are more prominent. Whether I have any enhanced credibility with brands or publishers remains to be seen.
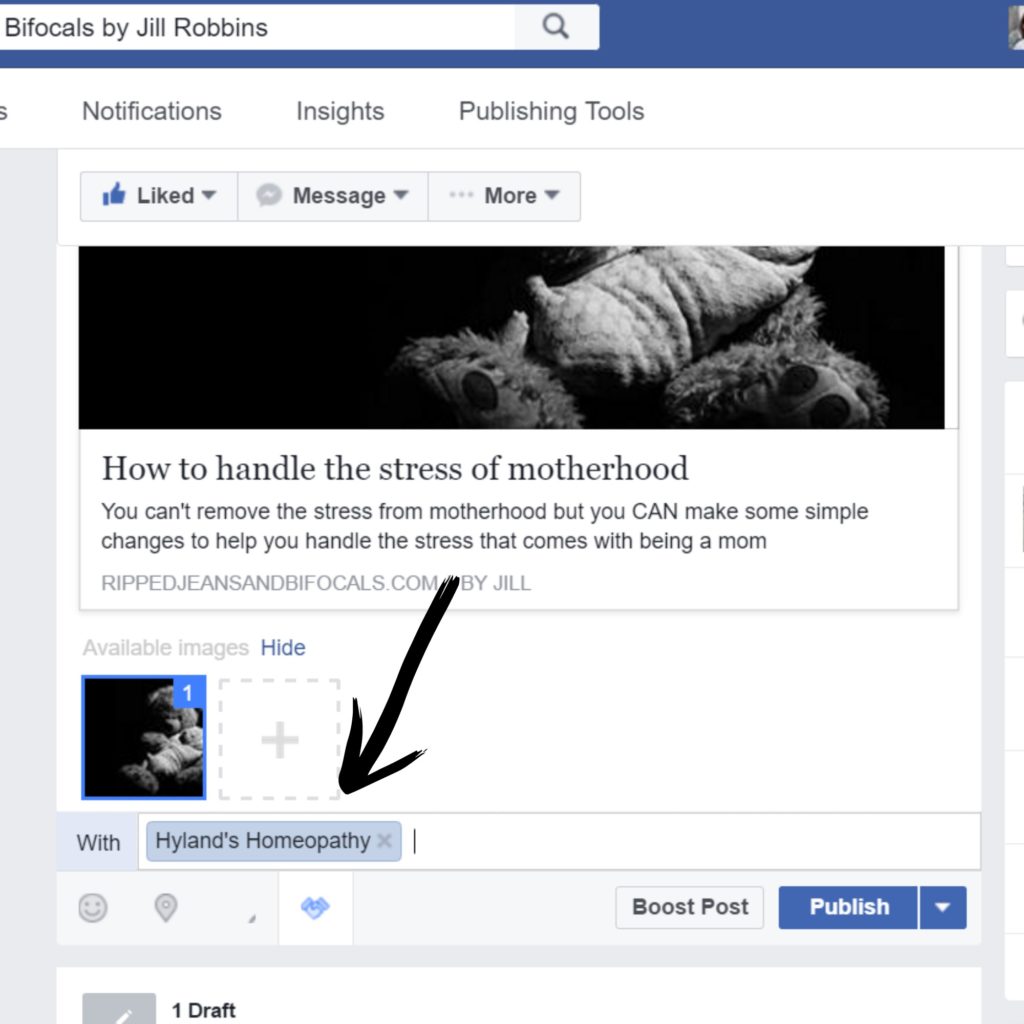
One caution about having a verified Facebook page is that rules for sponsored posts and branded content are different. Actually, the rules aren’t all that different but Facebook enforces them more strictly with verified pages. When you have a verified page, you have a new icon available to you when you create a post.
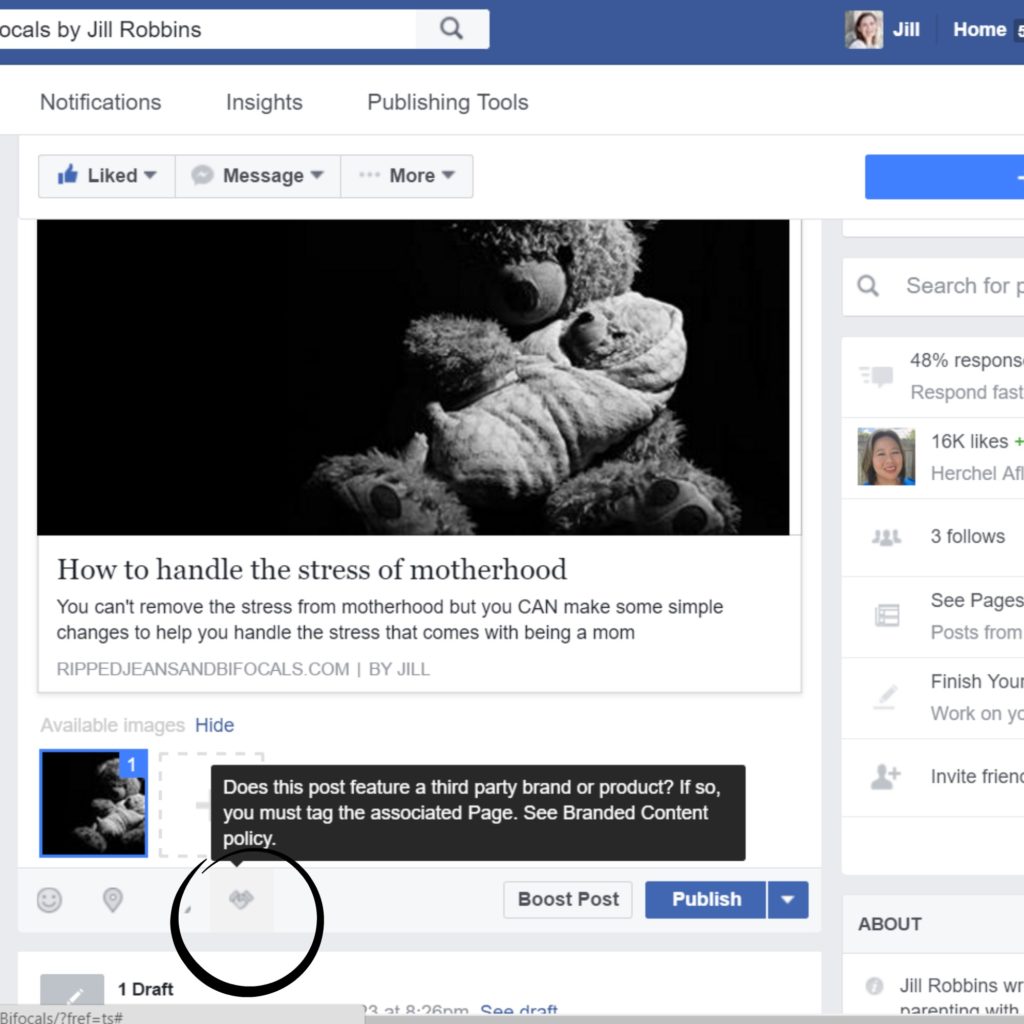
If your post contains branded content, you must tag the page. Facebook will monitor you to make sure you’re complying with the branded content policy – and they will issue a friendly warning if you don’t follow the rules. The brand you tag will also have some insight into how your post performed on Facebook.
So that’s how I got my page verified! It was a fairly straightforward process but honestly, it hasn’t really changed my day-to-day Facebook experience so far. It may give someone else the impression that I'm more legit and more credible and affords me some protection in the event someone wants to create a similarly named page.
Thanks for reading!
If you have a blogging and social media Pinterest board, you can click on the image below to pin.

A vote on Top Mommy Blogs helps my site a ton. It's super easy & one click helps me to be able to continue to bring you great content. Totally non-spammy…I promise!








To start my page’s verification process, I actually found it wasn’t too difficult, too! I just did what the quick help showed you: my page’s “Settings” in the top right and select edit on the third option down, “Page Verification.” That allowed me to either submit my phone number to contact/verify or documents to verify. I didn’t do Public Figure (Media/News/Publishing instead), so an I.D. wouldn’t suffice for me if anyone else runs into that problem! Thanks for the guide!
Good insight. I am still on the fence about it but you made a great choice in getting yours verified. Maybe one day I will get to see you speak 🙂
Facebook Page Verification to Increase your business and also Increasing your business rankings on search engines.